序
无意中看到腾讯云服务器的活动(Pony麻烦结一下广告费谢谢),趁着现在还不够25岁赶紧续了3次每次最多续1年

修改root密码
拿到服务器第一步就是把默认那个又长又难记的密码改掉
在命令行执行passwd

修改成功后记得新开个tab测试新密码能否登陆再退出当前会话
配置服务器免密登陆ssh-keygen
先查看本机有没有生成过ssh的公钥和私钥
1 | cd ~/.ssh |
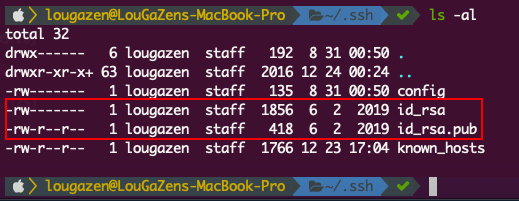
红框中的两个文件分别存放着私钥和公钥,如果没有这两个文件就按以下步骤来
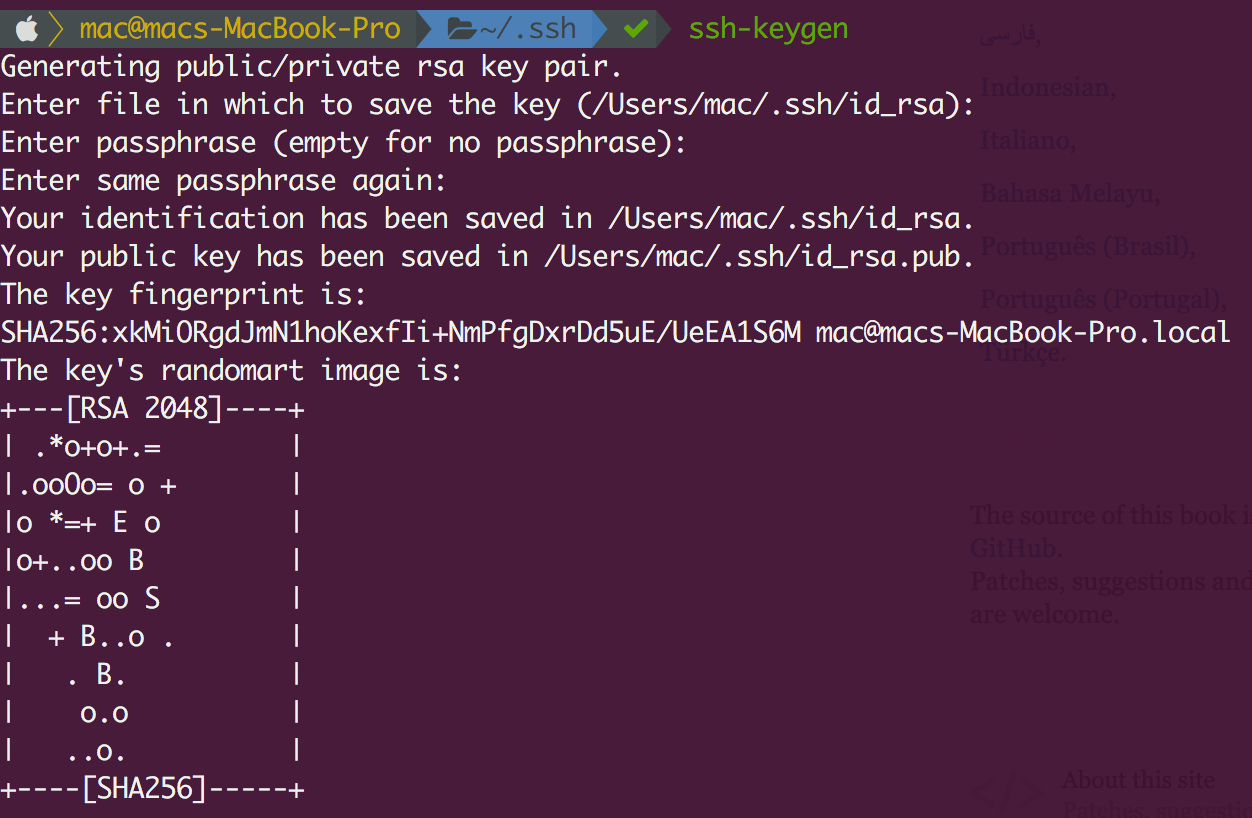
执行ssh-keygen然后按三下回车
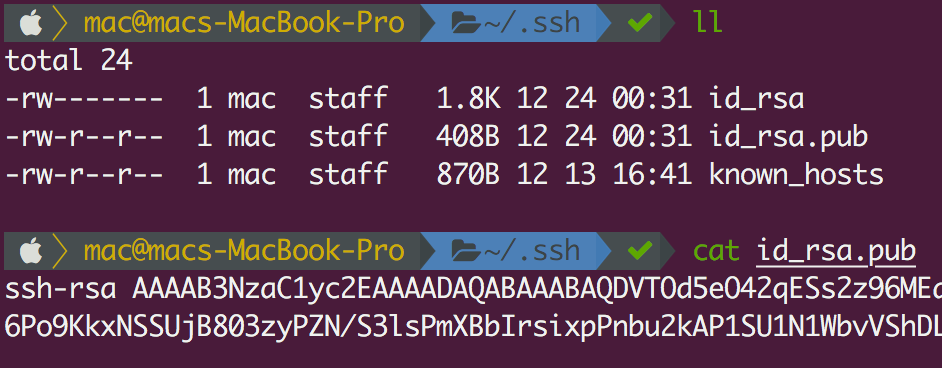
现在再去查看就有公钥的信息了
然后把这段公钥上传到目标服务器的~/.ssh/authorized_keys文件当中

测试一下,现在可以不用密码顺利登陆进来了

!!!注意:万一电脑丢失记得上服务器把该机器的公钥删掉
防火墙
服务器到手的时候自带了firewalld但是并没有启动,使用firewall-cmd --state命令可以查看firewall的运行状态

1 | systemctl enable firewalld # 启用自动启动 |
成功的话再次查看状态会显示running
把常用的服务和端口加入允许列表
1 | firewall-cmd --permanent --zone=public --add-service=http |
修改ssh默认端口
稍有常识的人 众所周知ssh默认端口是22,如果不加以修改很容易被人攻击
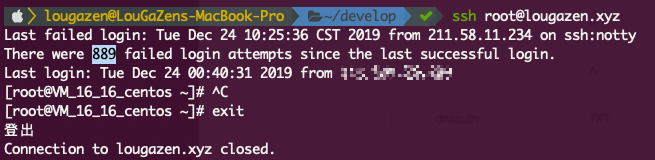
(题外话使用lastb命令可以查看尝试登录的客户端信息,如果信息太多则lastb > fail.log重定向到本地文件再查看)
ssh端口的配置存放在/etc/ssh/sshd_config中,直接在# Port 22下一行添加
1 | Port 22 |
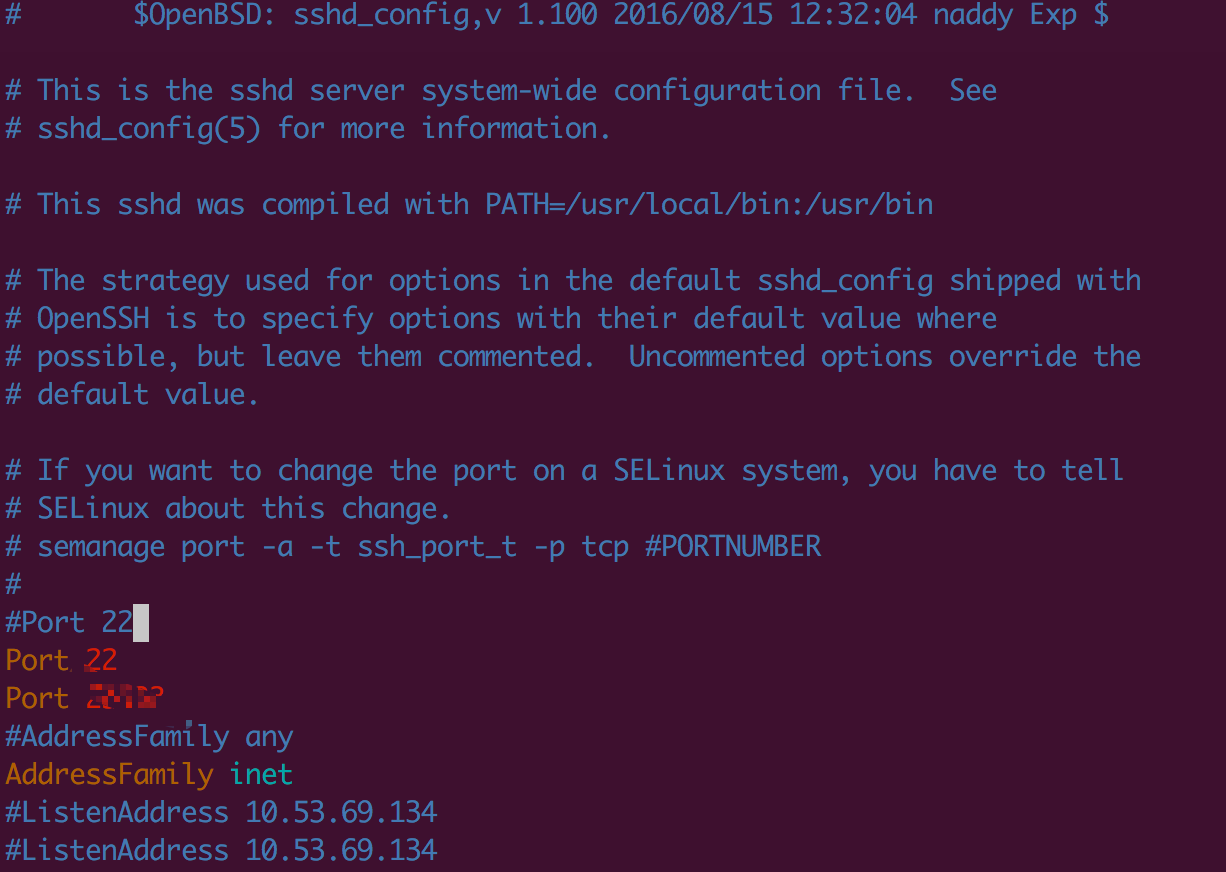
加上22端口是防止现在的连接失效,万一你添加的端口被防火墙屏蔽的那就gg了
然后再添加个防火墙允许规则
1 | firewall-cmd --zone=public --add-port=(你目标的端口)/tcp --permanent |
重启ssh服务
1 | systemctl restart sshd.service |
不要关闭当前连接,新开个tab尝试能否连接成功,成功后再去把22端口删掉
端口修改后跟ssh相关的命令要带端口参数
1 | ssh root@xxx.xx -p 123 |
安装docker
按照官方的文档把下面命令执行一遍就行了
1 | sudo yum remove docker docker-client docker-client-latest docker-common docker-latest docker-latest-logrotate docker-logrotate docker-engine |
使用docker启动nginx
首先在srv目录创建文件夹,用于放置ssl证书及nginx配置文件
1 | mkdir -p /srv/nginx-data/conf/cert |
把申请到的证书放在/srv/nginx-data/conf/cert目录下
在/srv/nginx-data/conf目录下创建一个index.conf的文件,内容如下
1 | # 使非www域名自动跳转到带www的域名 |
完成后执行以下命令启动docker版nginx
1 | docker run -d --restart=always --name nginx -v /srv/nginx-data/conf:/etc/nginx/conf.d:ro -p 80:80 -p 443:443 nginx |
其中一些参数的含义如下:
-d代表后台运行--restart=always代表docker启动的时候该container也一起启动-name给该容器命名方便管理-v映射目录,格式host目录:container目录(:ro),ro代表只读(read-only)-p开放指定端口,格式host端口:container端口
如果要修改nginx的配置文件,一般都要执行nginx -t测试和nginx -s reload来使生效,而在docker下就要执行
1 | docker exec nginx /usr/sbin/nginx -t |
Update: 2020-03-09 使用Ghost搭建博客平台
迫于域名备案需要域名能够正常访问并且网站上有相应的备案号信息,就先用Ghost弄个博客平台应付者先。
安装的方式还是使用docker,用docker就能很好将各个软件的运行环境隔离开来
安装Ghost
直接执行docker run -d --name ghost --restart=always -e url=https://你的域名 ghost
添加nginx配置文件
1 | location / { |
其中两个重点:
nginx反代的目标ip地址
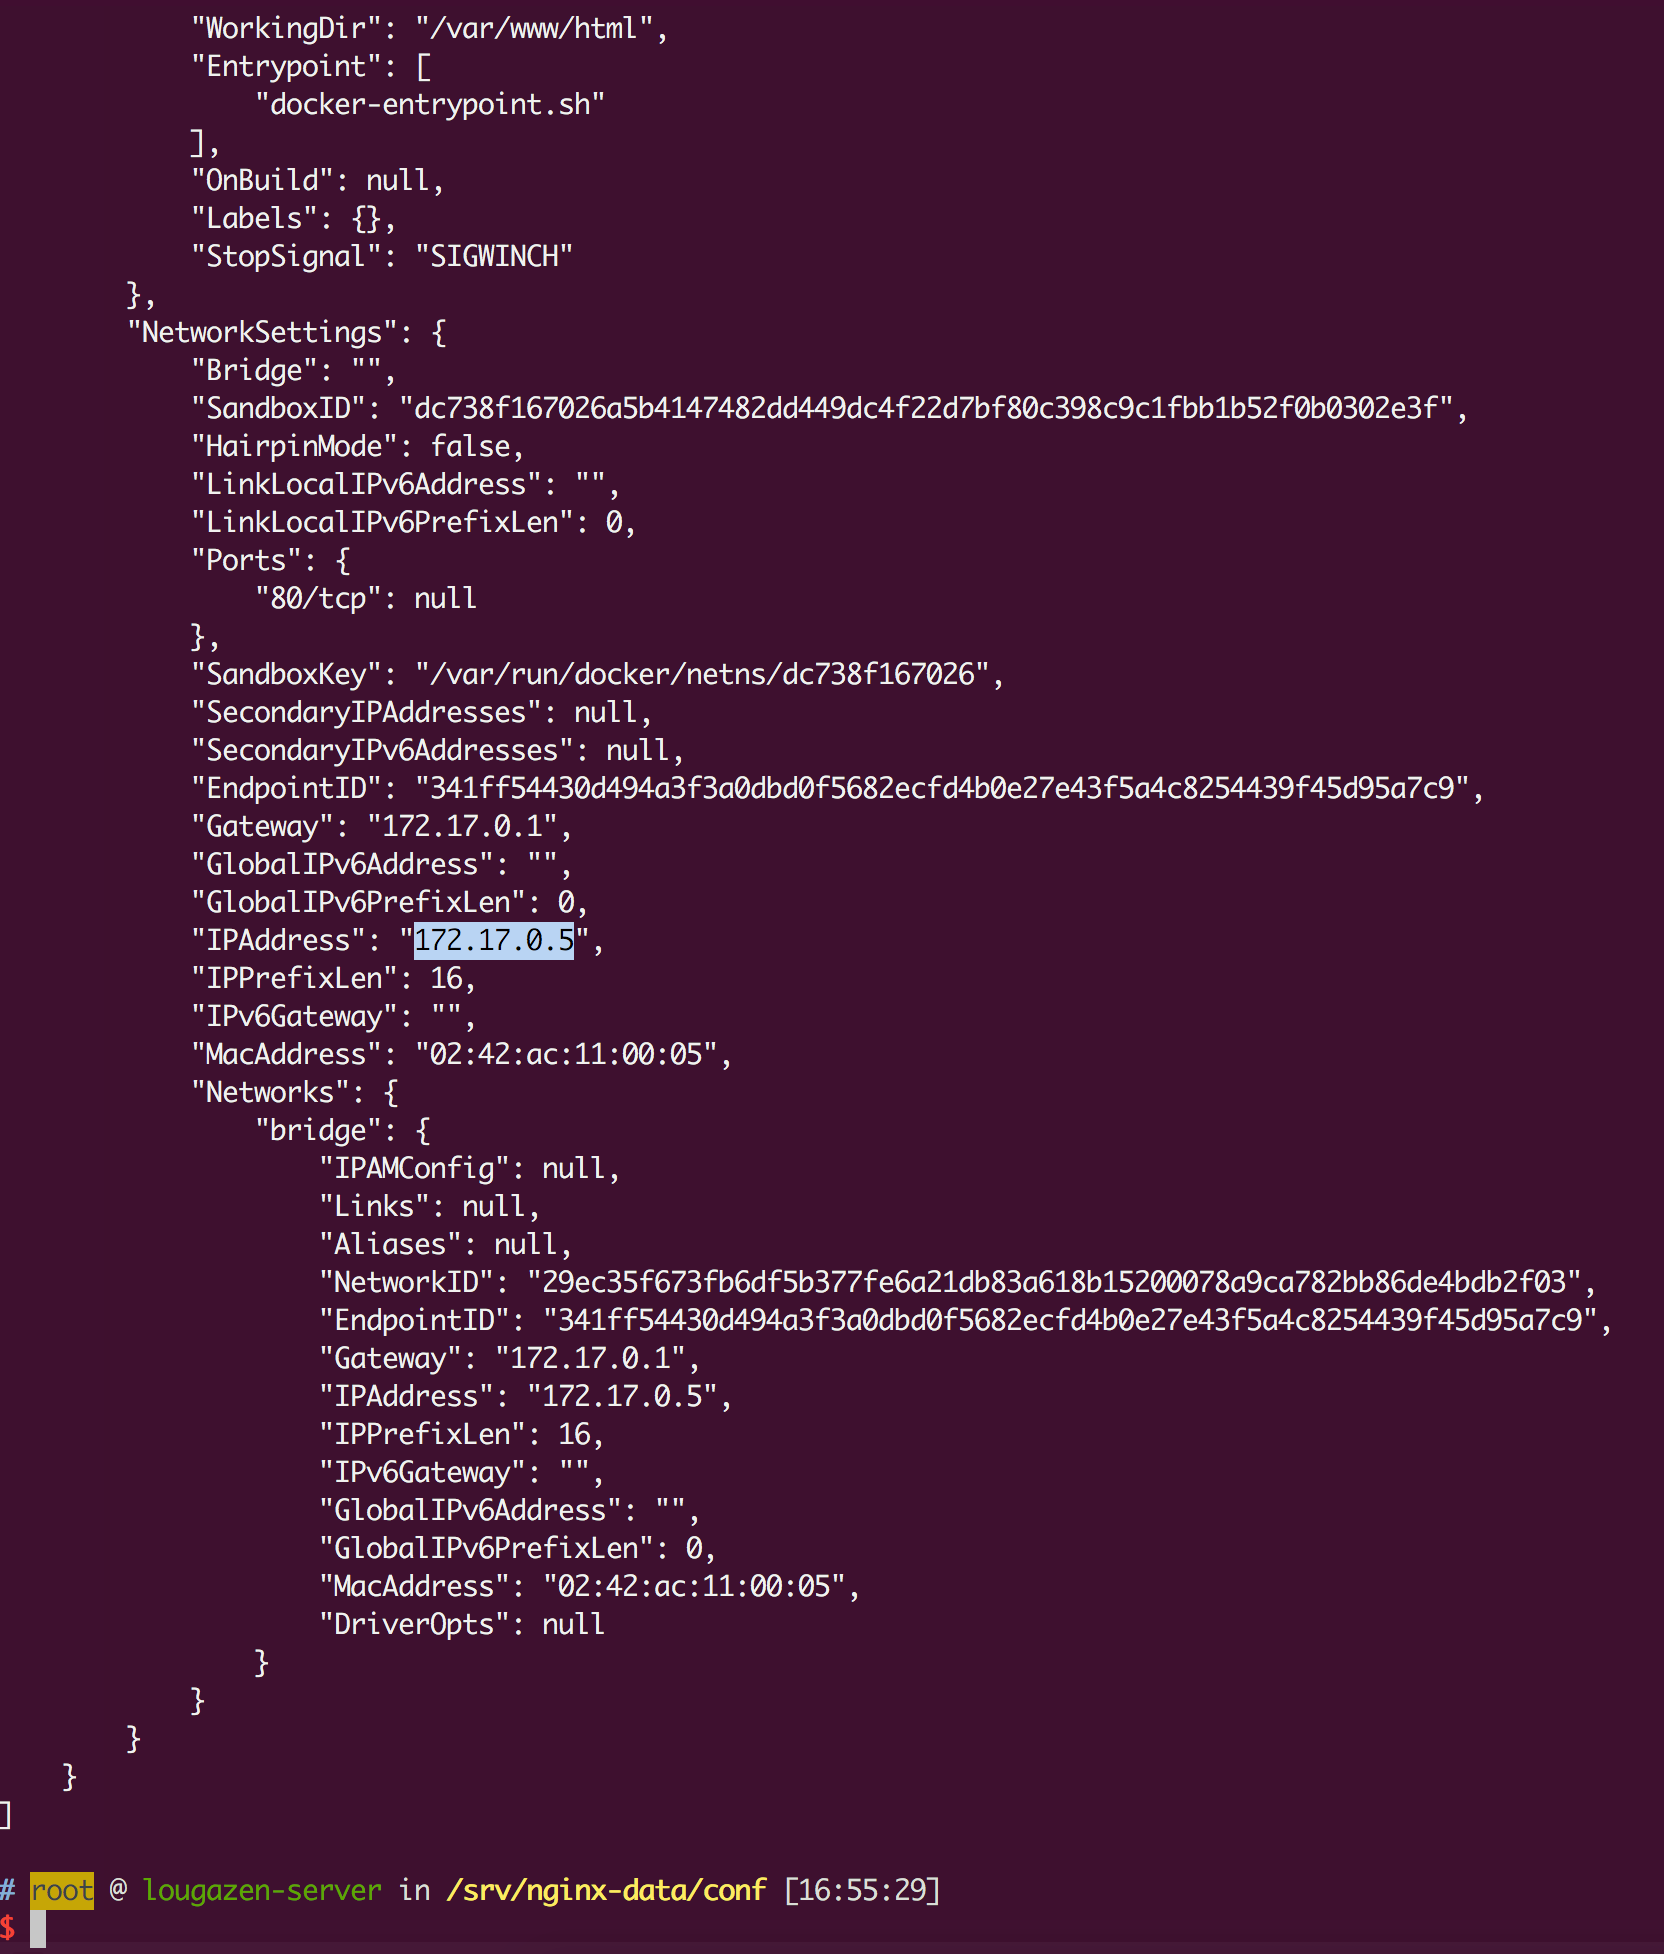
因为nginx与ghost是两个不同的环境,docker下的nginx访问宿主机的ip也比较麻烦,万幸在docker同一网络下运行的容器是可以互通的,所以只要拿到ghost的ip地址就行。
然鹅事情并没有那么简单,很多容器的运行环境都是十分精简的,精简到ifconfig命令都莫得。好在docker也有命令docker inspect 容器名字/ID去获取这些信息。
X-Forwarded-Proto
nginx的配置文件需要带上proxy_set_header X-Forwarded-Proto $scheme;这个header,否则就会出现无限重定向。
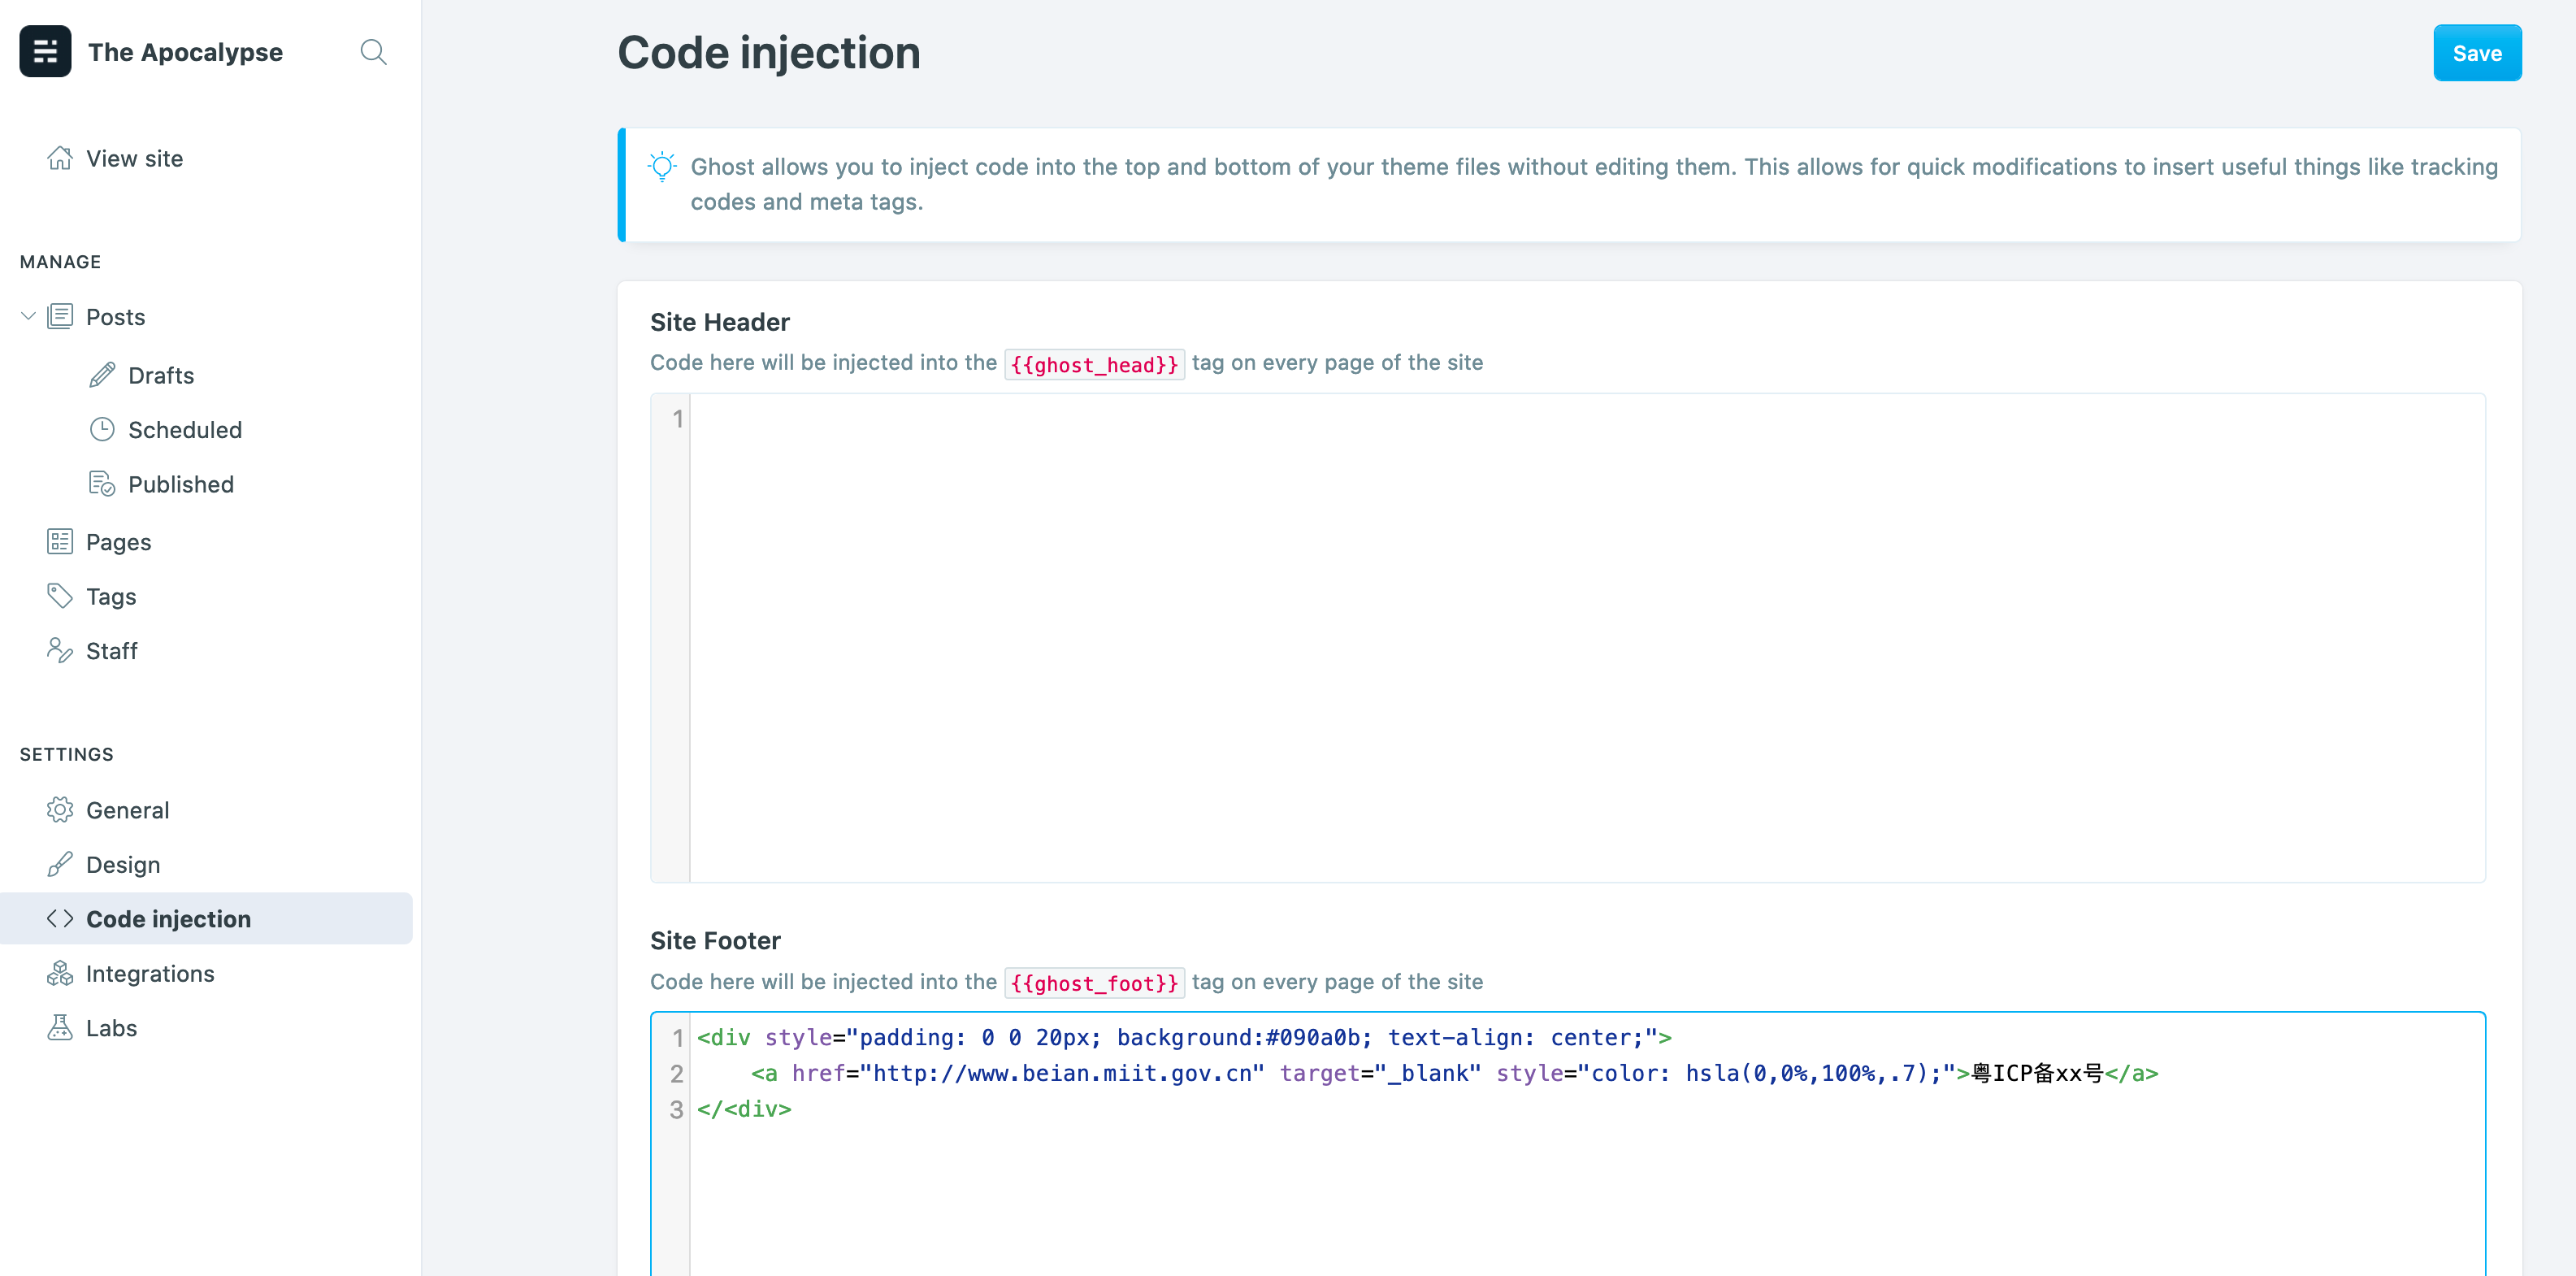
添加footer
以上这些都弄好后访问域名应该就能顺利打开Ghost了。Ghost的默认管理域名是https://你的域名/ghost,进入后完成一系列初始化设置,在左侧点击Code injection就能添加footer
1 | <div style="padding: 0 0 20px; background:#090a0b; text-align: center;"> |
鸣谢
4.3 服务器上的 Git - 生成 SSH 公钥
firewall-cmd
Centos7 修改SSH 端口
Get Docker Engine - Community for CentOS
ghost - Docker Hub
nginx - 安装在Docker上的Ghost使用环境变量配置了URL后无法访问,“重定向次数过多”